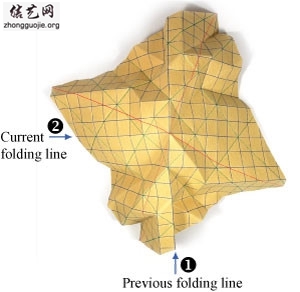
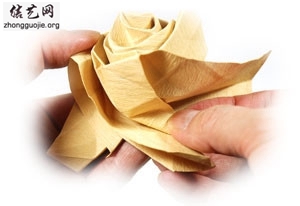
折纸玫瑰的折法十分多样,这主要是因为,在实际的制作过程中,没有几个折纸爱好者会完全遵从别人的折纸操作来进行折纸玫瑰花的折叠,更多的是将自己的一些即兴的想法融入到折纸玫瑰的折法中,从而创作出和别人不一样或者相似的折纸玫瑰来,这样的好处是可以极大的丰富折纸玫瑰的种类和样式,至少在样式上面,我们可以看到许多完全不同的制作,从而享受到来自折纸玫瑰制作所带来的乐趣。我们能够享受到这些美妙的手工DIY感觉,也都要感谢默默无私分享其教程的朋友们! 图文对照英文版,超详细,不懂英文的可以直接看图,不要被那些横轴纵轴所吓倒,制作者只是一个示范。懂英文的当然更加好办,直接看文字与图片学习。下载教程的时候图文是分开的,所以文字与图片对照是我一个一个加上去,检查过应该没有错误,大家可以放心学习~
作者:Hyo Ahn
Level Advanced
Designer Hyo Ahn
The back side is the same as the front side. 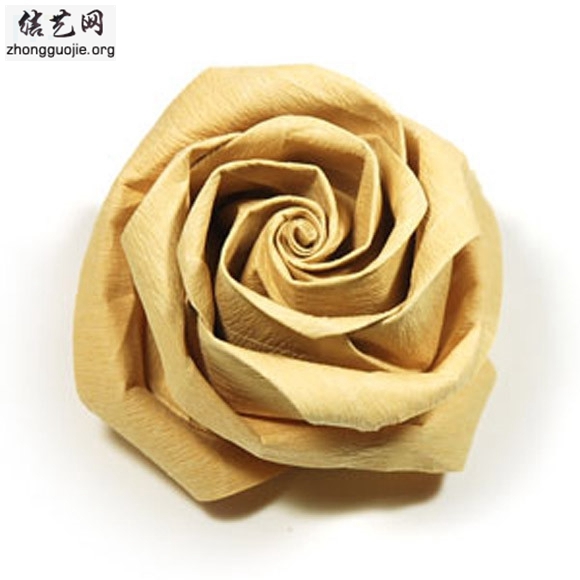
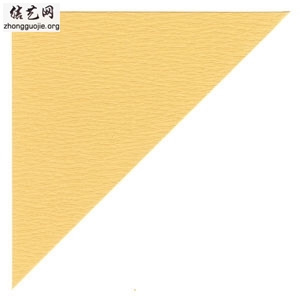
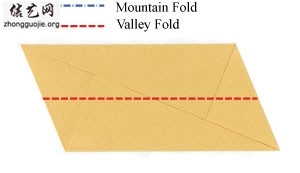
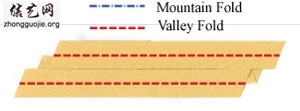
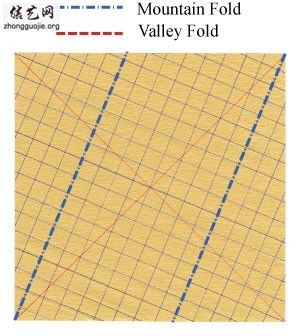
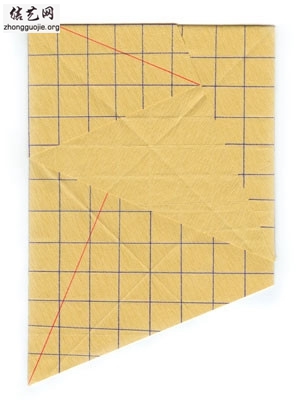
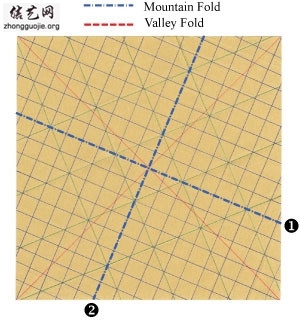
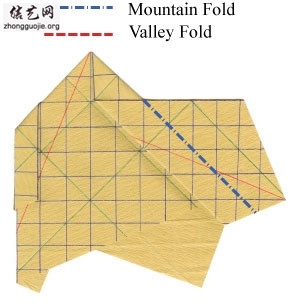
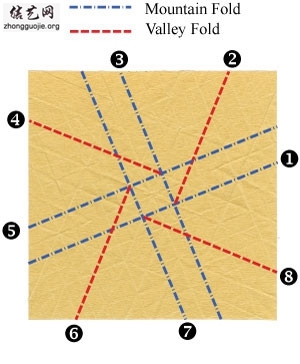
黄色折纸玫瑰超详细图片教程(英文版),图片步骤很多,大家看图学习吧! 1.Fold (mountain fold) the paper in half diagonally.
 2.Unfold the paper so that you can see the crease that you have just made.*
we have used a red pen to distinctively show the "crease"
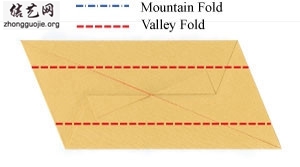
Prepare for two valley-folds.
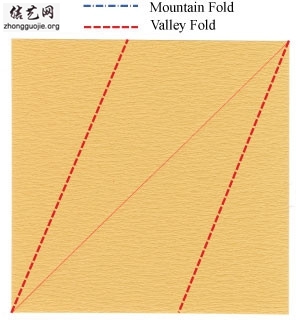
3.Apply two valley-folds shown in the step #2.
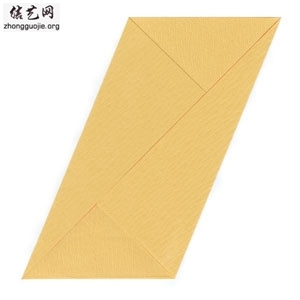
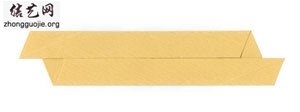
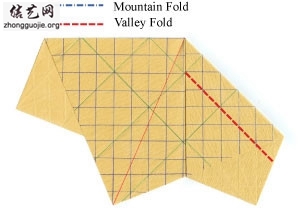
4.Rotate the paper by 67.5 degrees in the clockwise direction so that the slanted vertical lineof edge
becomes a horizontal line.Prepare for a valley fold in half.
5.Valley-fold according to the step #4.

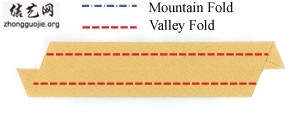
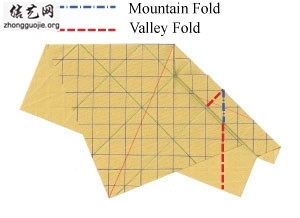
6.Unfold the previous valley-fold.Prepare for two valley-folds.
7.Valley fold along two red dash-line in the step #6.
8.Turn the paper over.Prepare for two valley-folds.
9.Apply two valley-folds of the step #8.Prepare for another two valley-folds.
10.Valley-fold according to the step #9.

11.Turn the paper over.Prepare for another valley-fold.
12.Valley-fold according to the step #11.

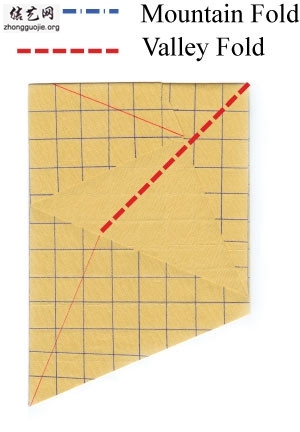
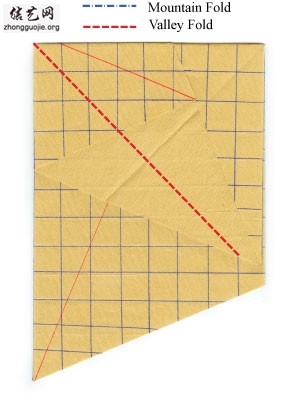
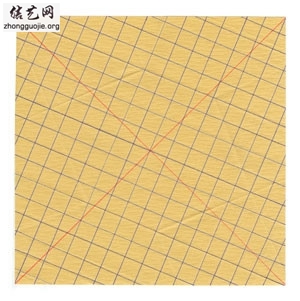
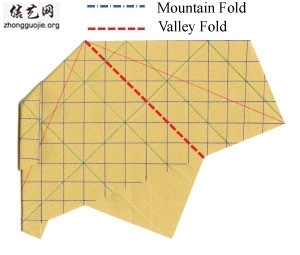
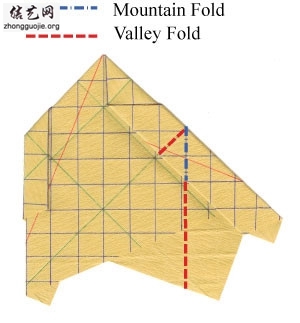
13.Unfold everything and draw lines on all creases.Prepare a valley-fold.

14.Valley fold along the red dash-line shown in the step #13.

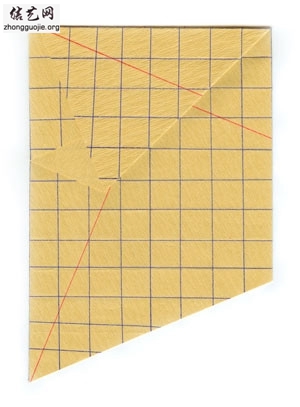
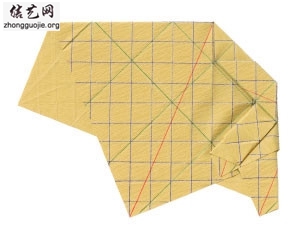
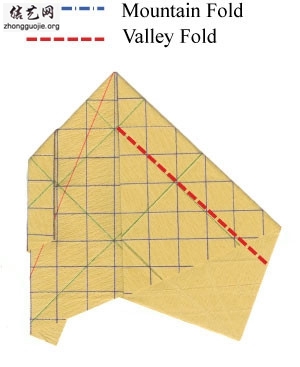
15.Unfold and draw a line on the crease. Prepare for a valley-fold along the red dash-lines.
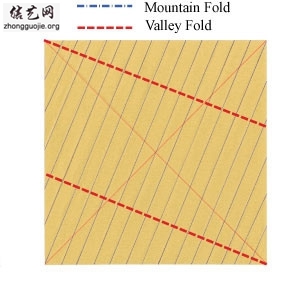
16.Valley-fold according to the step #15.This is the same as the step #4.
17.Repeat the steps #6-13.
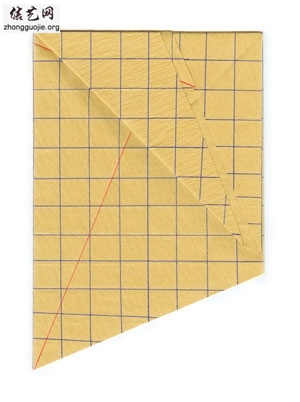
18.Prepare for two mountain-folds.
 黄色卷心折纸玫瑰超详细图片教程19. Apply two valley-folds according to the step #18.Prepare for one valley-fold marked as (1).We will not apply the valley-fold marked as (2). We will save it for the step #25. 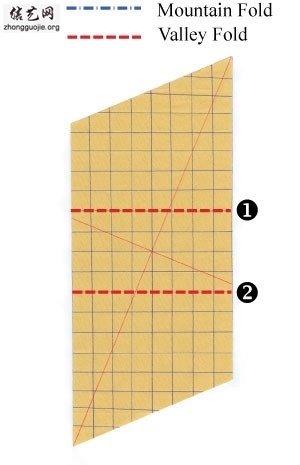
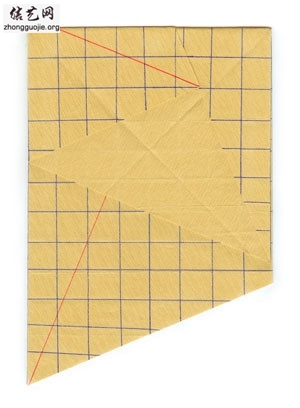
20.Apply the valley-fold of the step #19-(1).Prepare for another valley-fold.
精致复杂玫瑰花折纸21. Valley-fold according to the step #20.
 黄色卷心折纸玫瑰超详细图片教程22. Unfold the previous fold of the step #21. You can clearly see the crease.Prepare for another valley-fold (red-dash line).
23.Apply the valley-fold of the step #22.
 24.Unfold the previous folding.One can clearly see two creases.
25.Now, we go back to the step #19 and remember the saved valley-fold of (2).
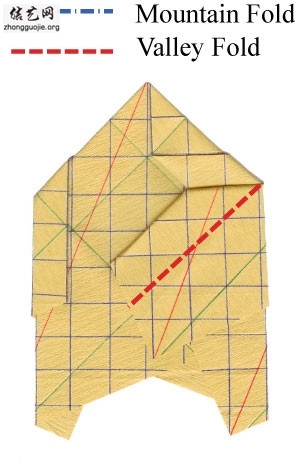
26.Apply the saved valley-fold of the step #25-(2).Prepare for two valley-folds We will repeat the steps #20-24.
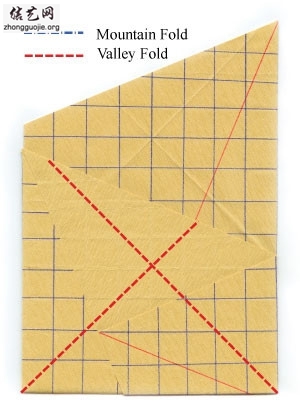
27.Valley-fold along two red dash-lines shown in the step #25. This will be the exactly same as repeating the steps #20-24.Unfold two valley-folds and you can clearly see two creases from these two foldings.
Althogether we have four creases.
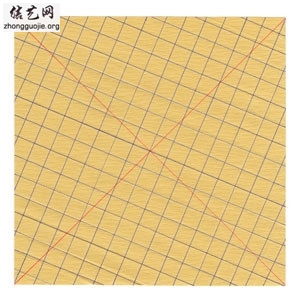
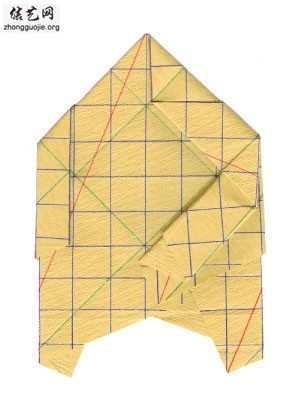
28.Open the paper. You should be able to find eight creases.
29.There are eight creases. Fold along all creases. (1) First,
fold along blue dash-lines and then (2) fold along green dash-lines.
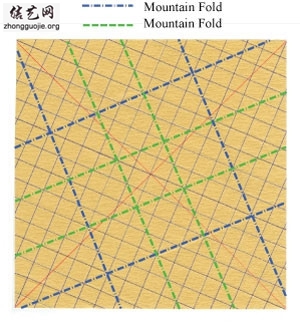
30.This is after the folding of the step #29-(1).
31.This is after the folding of the step #29-(2). .
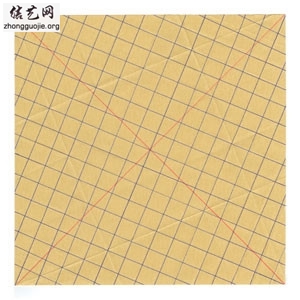
32.Let's draw green lines on the creases.Prepare for a mountain fold on a blue dotted-dash line of (1).
We will be folding through steps #33-44 based on the line (1).
Then we will repeat the steps #33-44 for the line (2).
33.Apply the mountain-fold of the step #32.Prepare for a valley-fold.

34.Apply the valley-fold of the step #33.Prepare for another valley-fold.
35.Apply the valley-fold of the step #34.Prepare for a mountain-fold.
36.Apply the mountain-fold of the step #35.Prepare for both valley and montain-folds.
 精致复杂玫瑰花折纸37. Apply both valley and montain-folds of the step #36.Prepare for another valley-fold. 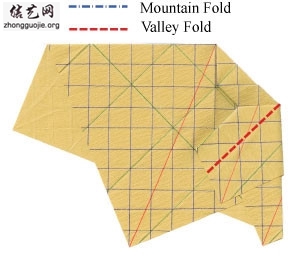
38.Apply the valley-fold of the step #37.The folding of the front-side is completed.
39.Turn the model over.We are in the same situation of the step #33.Prepare for a valley-fold.
40.Apply the valley-fold of the step #39.Prepare for a valley-fold.
41.Apply the valley-fold of the step #40.Prepare for a mountain-fold.
42.Apply the mountain-fold of the step #40.Prepare for both mountain and valley-folds.
43.Apply both mountain and valley-folds of the step #42.Prepare for a valley-fold.
44.Apply the valley-fold of the step #43.
45.Open the paper but not fully.If you remember the step #32,I mentioned that we will be mountain-folding along the line (2) after we are done through steps #33-44.
46.Now it is the time to open the paper fully and mountain-fold along the line (2).Then repeat everything for the steps #33-44.You have just completed the "preparation folds" for the new Kawasaki's rose.
47.Now, we are on the "main-folding" section. Prepare both mountain and valley-folds.
48.Apply both mountain and valley-folds according to the step #47.Re-touch the paper a little to make the paper to resemble the one on the left.If you have folded standard rose or QT rose,then this form must be familar to you.
49.Press the paper down while rotating the center to 90 degrees counter-clockwise.
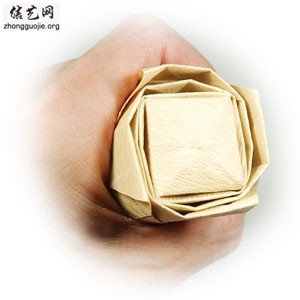
Make sure the center is popping out.

黄色卷心折纸玫瑰超详细图片教程50. (a) Carefully and slightly pull two opposite sides in the opposite directions.(b) Rotate the paper by 90 degrees in the counter-clockwise direction. 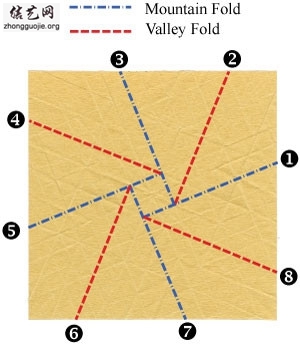
51.Do as many as (a) and (b) of the step #50 so that the flattening will be symmetrical
in both the horizontal and vertical direction.
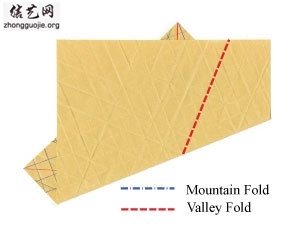
精致复杂玫瑰花折纸 52.Gently press the center so that it is completely flat.You are now
ready to form the shape of the new Kawasaki rose flower.
 53.Flip the paper over. Now, the paper has four quadrants. Try to imagine that the x-axis is attached to the edge of quadrant IV and the negative y-axis to the edge of quadrant III.
54.Hold the negative y-axis (i.e., the edge of quadrant III) with two fingers and try to align it with the x-axis (i.e., the edge of quadrant IV).If you do it correctly,then it will make two valley-folds and two mountain-folds shown on the left.
55.Try to align two edges (x-axis and negative y-axis).
56.The negative y and x-axes are aligned exactly.
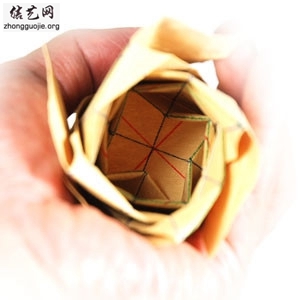
 精致复杂玫瑰花折纸57. Do the same folding (steps #53-56) with other quadrant IV so that it aligns with quadrant I.Repeat three times so that quadrant I aligns with quadrant II and quadrant II aligns with quadrant III.If the paper is released, it would looks like the picture shown on the left. 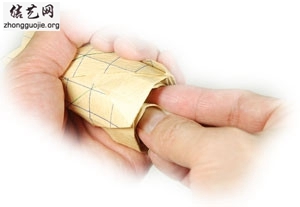
58.This is the flipped-over view. 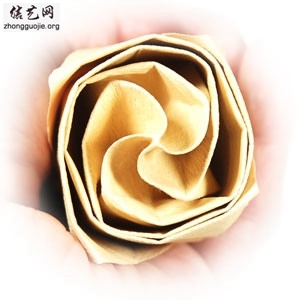
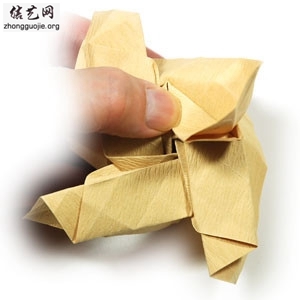
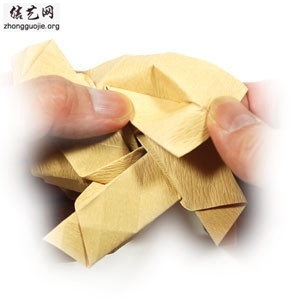
59.Gather all the four sides of the rose so that they are grapsed in your fist.
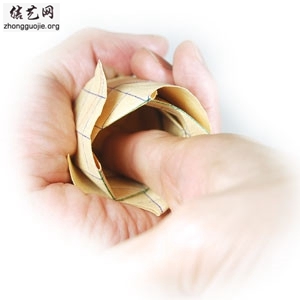
60.Here is how the bottom and the inside of the rose looks like.
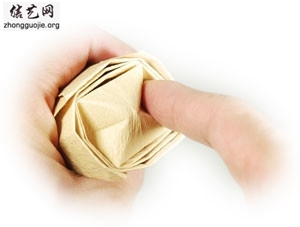
61.Insert a finger inside the center of the closed bud to open it.
I think it is the right time to do this now since it is much difficult to do this later.
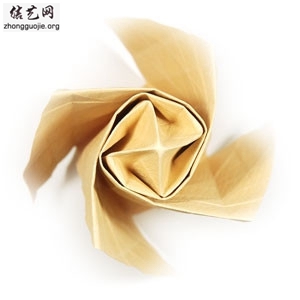
黄色卷心折纸玫瑰超详细图片教程 62.Keep working with your finger until all petals are smooth.This is the top view. 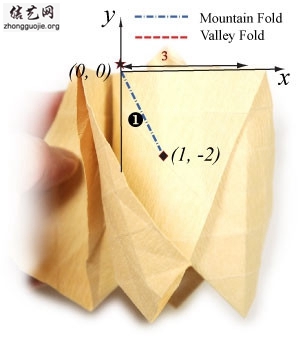
63.This is the bottom view. 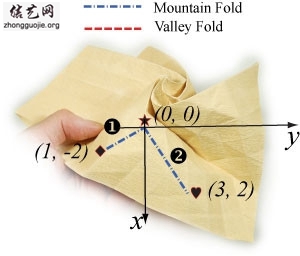
64.Insert your finger and use it as an iron to flatten the side wall. 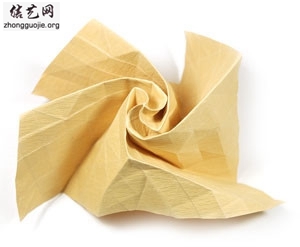
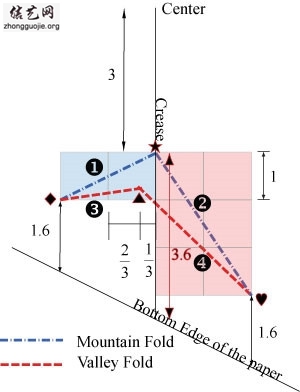
65.We need to prepare for a" double reverse fold" consisting of two mountain and two valley folds.Double-reverse fold map is shown in detail on the left.The order of folding will be:
(1) star --> diamond
(2)star --> heart
(3) diamond --> triangle
(4) heart --> triangle
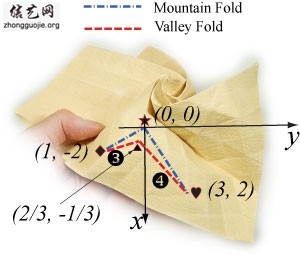
67.The next thing is to find the "heart" point which is located at (3, 2).Thus, by finding (a) star point, (b) diamond point, and (c) heart point, we can easily apply two mountain-folds along the path.
68.Apply two mountain-folds shown in the steps #66-67.
69.Now, we need to find the "triangle" point which is located about (2/3, -1/3).Prepare for two valley-folds starting from the diamond point to the triangle point and then to the heart point.
70.Apply two valley-folds according to the step #69.
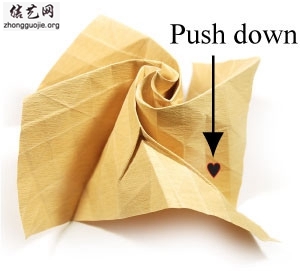
71.Prepare for a pushing of the "heart" point down.
72.Apply the push.
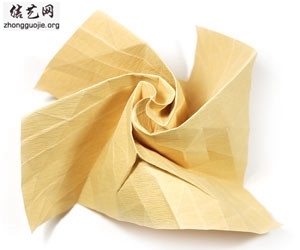
73.Apply the steps #65-72 to all four sides.
74.Gather all the four sides of the rose so that they are grasped in your fist.
75.Let's concentrate on the bottom-half.Prepare for a valley-fold along a crease.
76.Apply the valley-fold of the step #75.Turn the rose by 90 degrees
clockwise direction to work on next leg.

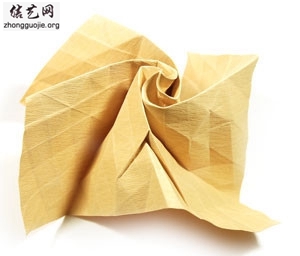
77.Apply the steps #75-76 to all four sides.The picture on the left will be the bottom view of the rose.
78.This is the top view of the rose.
79.This is the side view of the rose.Prepare for a reverse fold at the edge of a petal.
80.Apply the reverse fold so that the petal is attached to the main body.

82.Apply the reverse fold of the steps #79-81 to all four petals.This is the top view after the completion of the reverse folds for all four petals.It is good to compare this picture with the one before the reverse folds (step #78).
83.Turn the rose over so that you can see the bottom.Prepare for a valley-fold.
84.Apply the valley-fold of the step #83 using your right thumb and index fingers.
Then press it with left thumb.
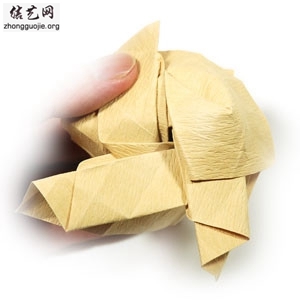
85.Slowly flip the surround paper over with right thumb and index fingers.
86.Smooth out the surface.The steps #83-86 is called a "locking fold".
87.Repeat the steps #83-86 to all four legs.The bottom is compelely closed.

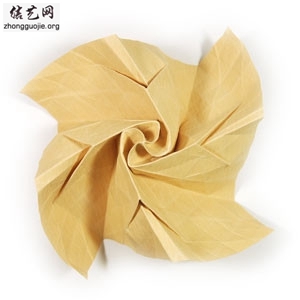
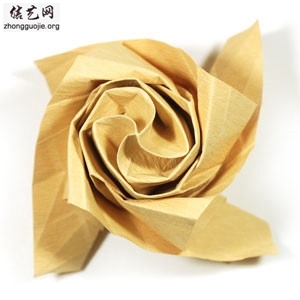
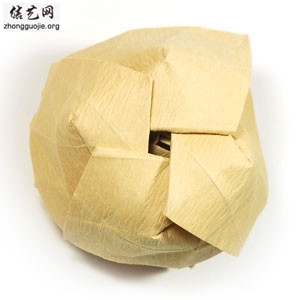
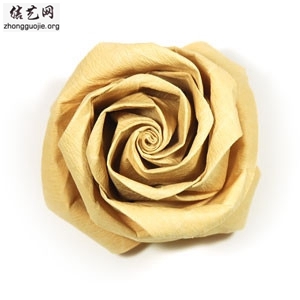
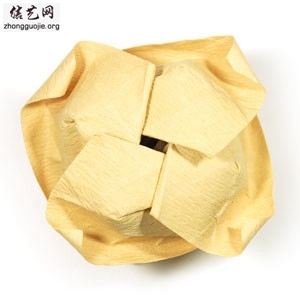
88.Turn the rose over.This is the top view of the rose.
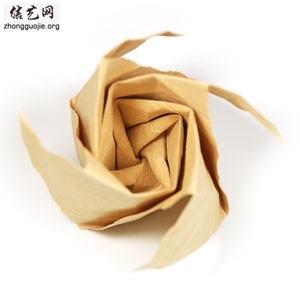
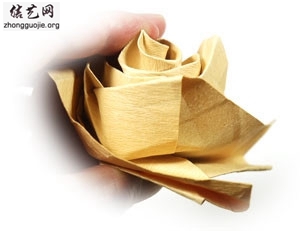
The structure of the new Kawasaki's rose is now completed.
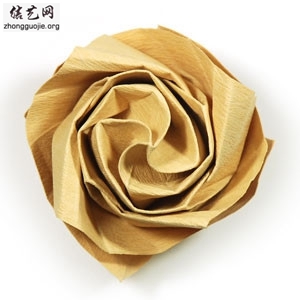
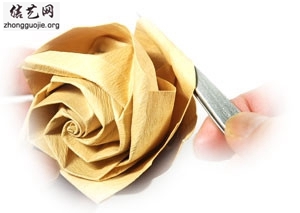
89.Curl each petal with your fingers.
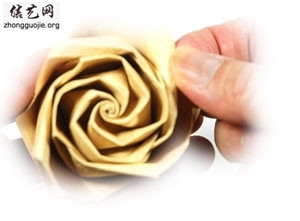
90.You can also curl petal with tweezers.
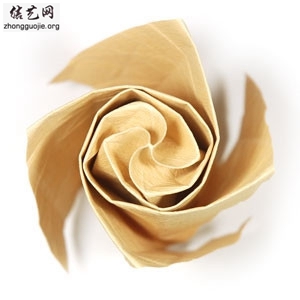
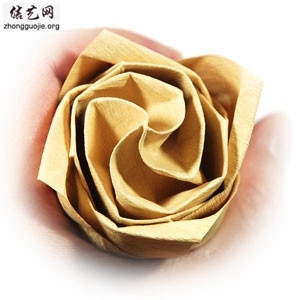
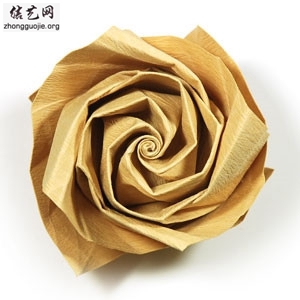
91.New Kawasaki's rose is now completed.
92.This is the bottom view of the rose.
93.Congratulation! You should be proud of yourself.
I think you have accomplished something meaningful here.
[db:图片]
| 
